P-51D cockpit build

Re: P-51D cockpit build
I wouldn't dare to take it apart ones it's been build  But I think it's going to look much better.
Re: P-51D cockpit build
When you get a chance a pic of the gauges lit up would be awesome, a video of the sim in action would be even better 
Really nice work
Cheers
Shawn
Really nice work
Cheers
Shawn
Re: P-51D cockpit build
Thanks guys!
Ralph, I'm a little lost. What do you mean take it apart?
Ed
Ralph, I'm a little lost. What do you mean take it apart?
Ed
Re: P-51D cockpit build
I thought it was almost finished. Now it seems like you took it apart.
Re: P-51D cockpit build
Finished? I'm not sure this will ever be finished. 
When I started I thought this was a 6 month project. Now, 19 months later, I'm still working on the pit and adding new features like great Air Manager gauges!
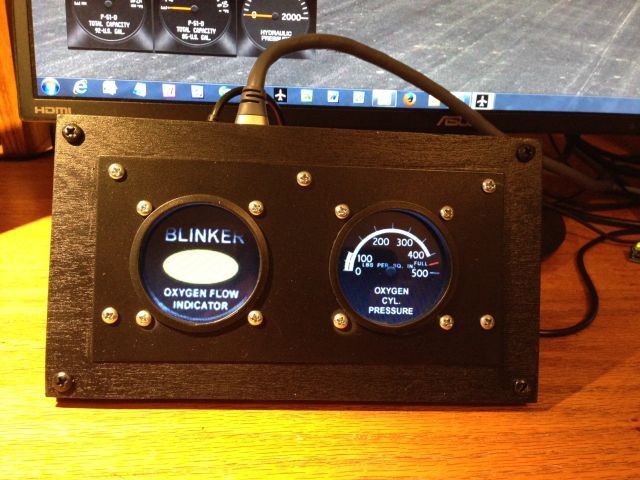
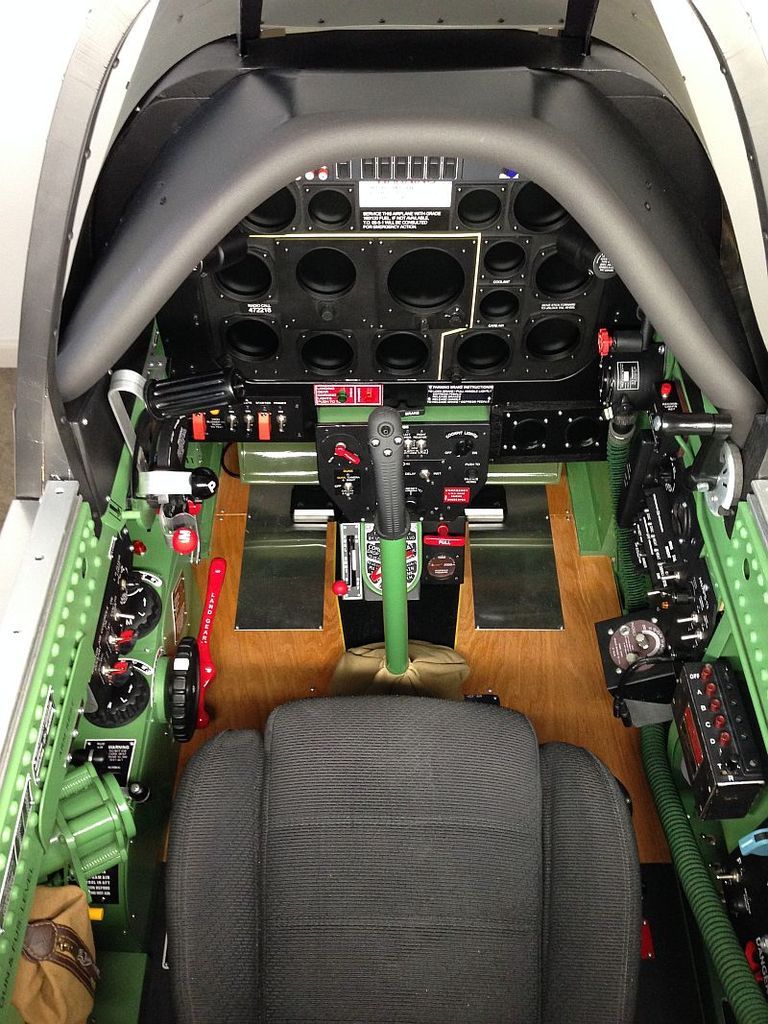
I completed the O2 gauge holder today. I had to make a few deviations from the real plane due to a larger screen but at least it's a few million dollars less than a real Mustang.
Thanks everyone for your help.
Ed
Sorry about the blurry pic but you can see the new gauges in place.
And finally the gauges running in Air Manager.
When I started I thought this was a 6 month project. Now, 19 months later, I'm still working on the pit and adding new features like great Air Manager gauges!
I completed the O2 gauge holder today. I had to make a few deviations from the real plane due to a larger screen but at least it's a few million dollars less than a real Mustang.
Thanks everyone for your help.
Ed
Sorry about the blurry pic but you can see the new gauges in place.
And finally the gauges running in Air Manager.

Re: P-51D cockpit build
Amazing job, they look great......How do they look on those screens?
OORAH!!!! Its a Marine Thing....USMC retired
Re: P-51D cockpit build
They look great on the small screens.
Re: P-51D cockpit build
That looks fantastic, both the gauges and the panel you built for them.
Cheers
Shawn
Patiently awaiting a inflight video
Cheers
Shawn
Patiently awaiting a inflight video
Re: P-51D cockpit build
Hello everyone
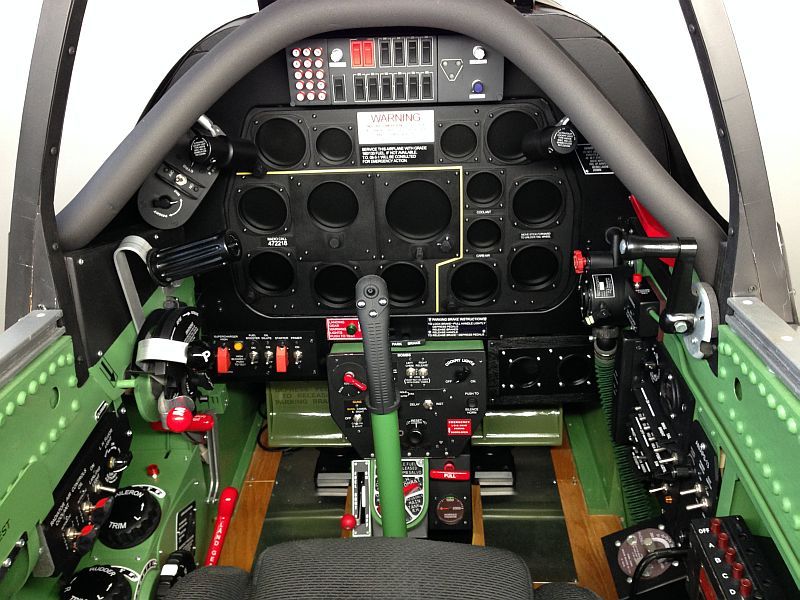
It’s been a while since I last posted about my build so here is an update. Over the weekend I finalized a lot of the work on the pit. It is not complete yet (will it ever be?) but it is to the point that it can be moved from the shop to my office/hanger where it will reside. I took advantage of the great weather and moved the pit from my shop to the main part of the garage so I could take some pictures.
The pit is 3½ ft. wide by 6 ft. long and 4½ ft. tall and was built in my 10 by 12 ft. shop. That sounds like a lot of room to work until you figure in the 10 foot long counter top on one side and the workbench, tool chest and file cabinets on the other. That allows 5 feet of workable space and with this project I found myself moving 1-2 things to get to the third. The shop was built for small projects like models but this 1:1 scale model pushed the limits!
As I may have mentioned before this pit has to go through an opening in the house 29 inches wide. It will break down into 2 sides, the back, a main base, seat, windshield and dash and be reassembled in my office. You will see some of this in the pics below.
Take care
Ed
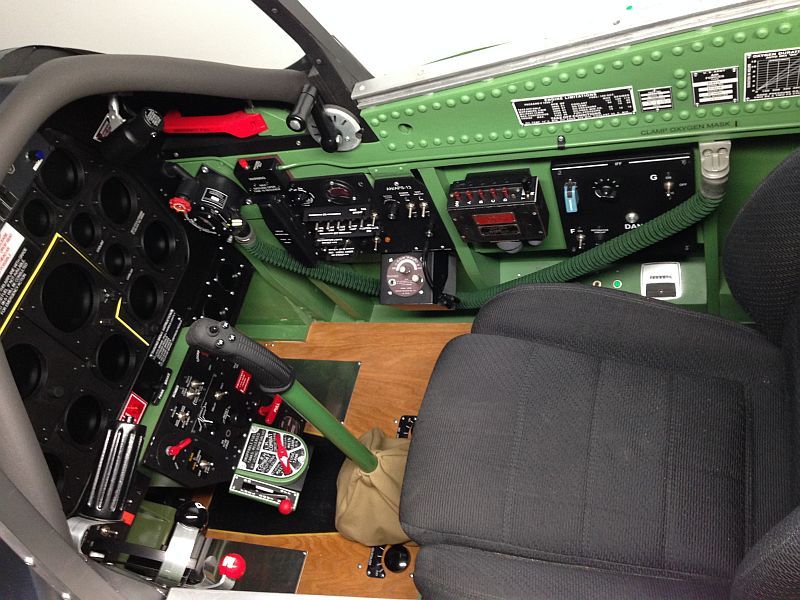
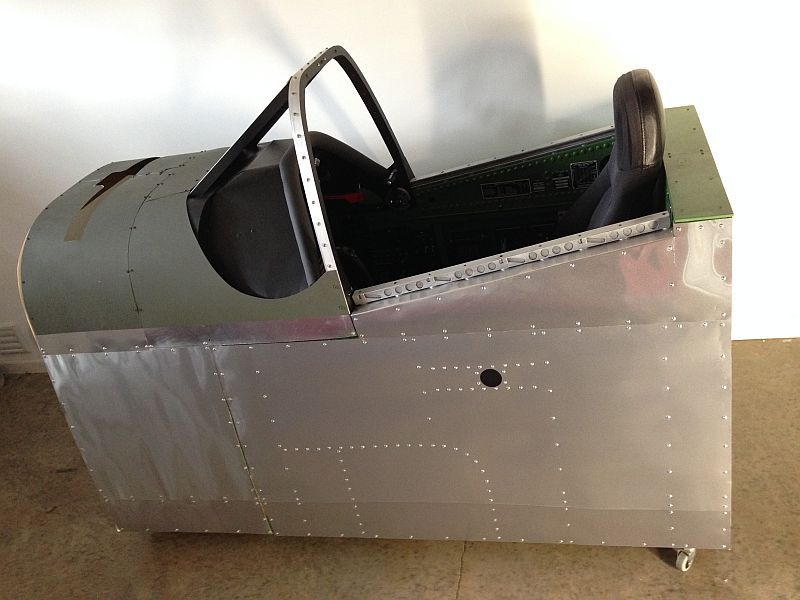
The “office”
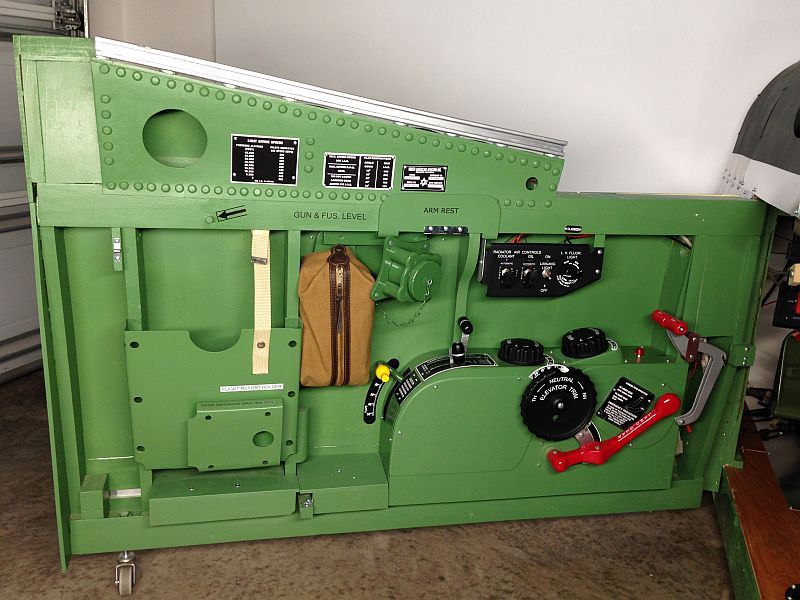
Left side opened as a door showing the caster supporting the non hinged end.
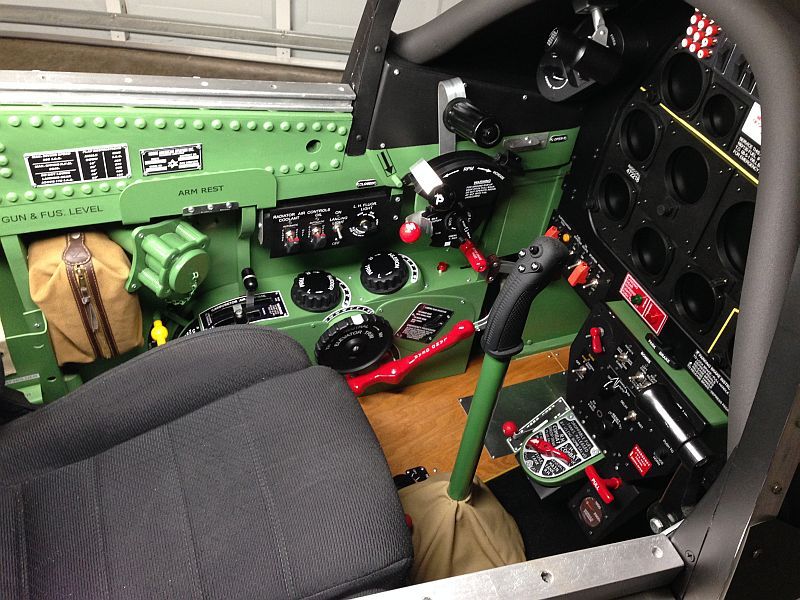
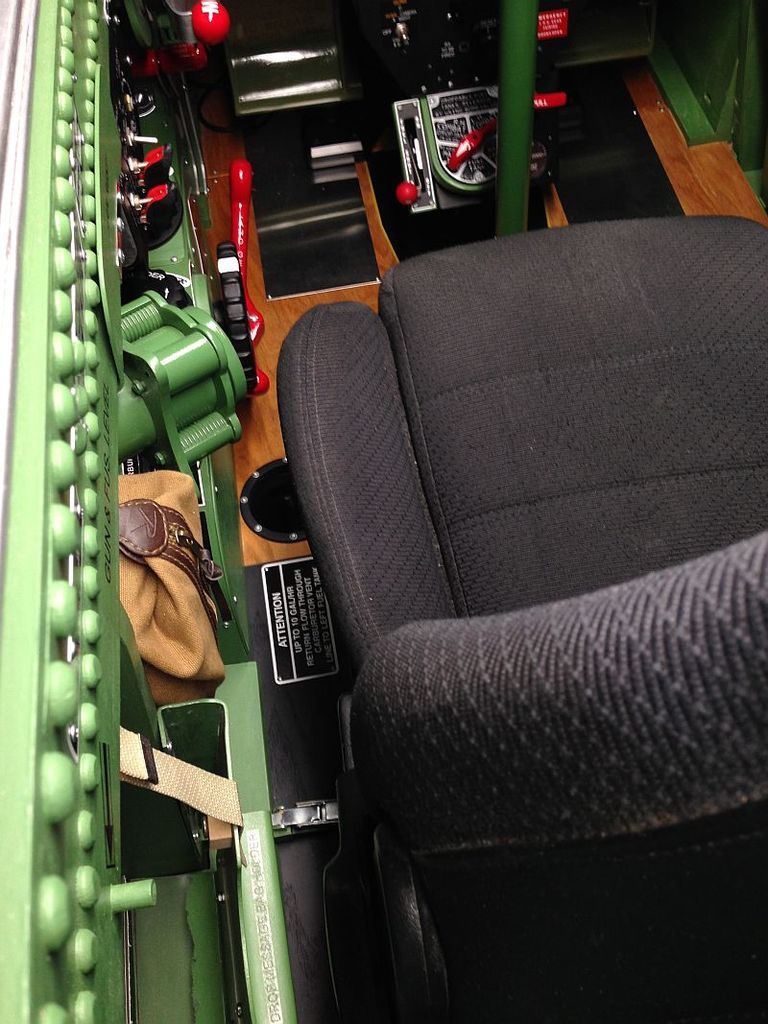
Next to the seat you can see a small latch. This is used to pull the side tightly closed.
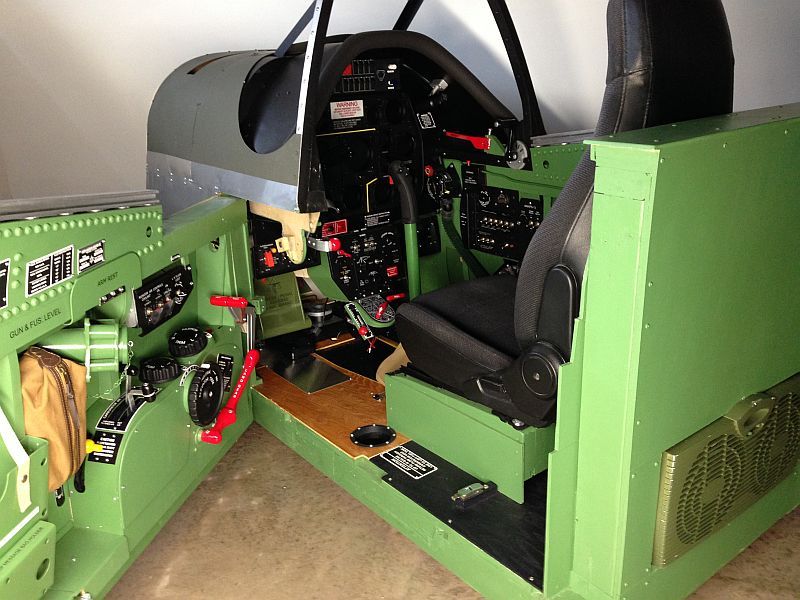
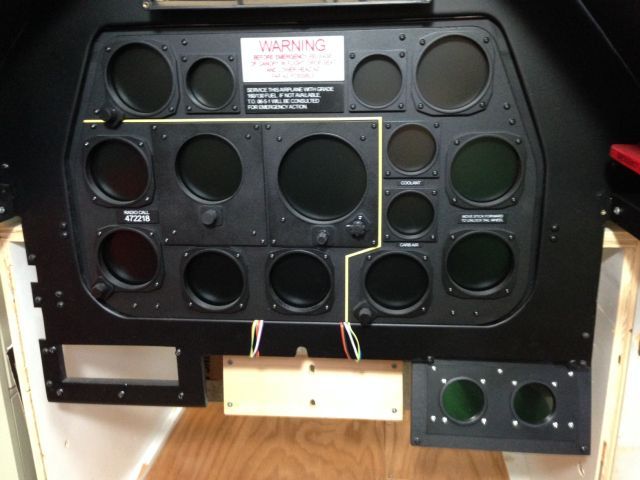
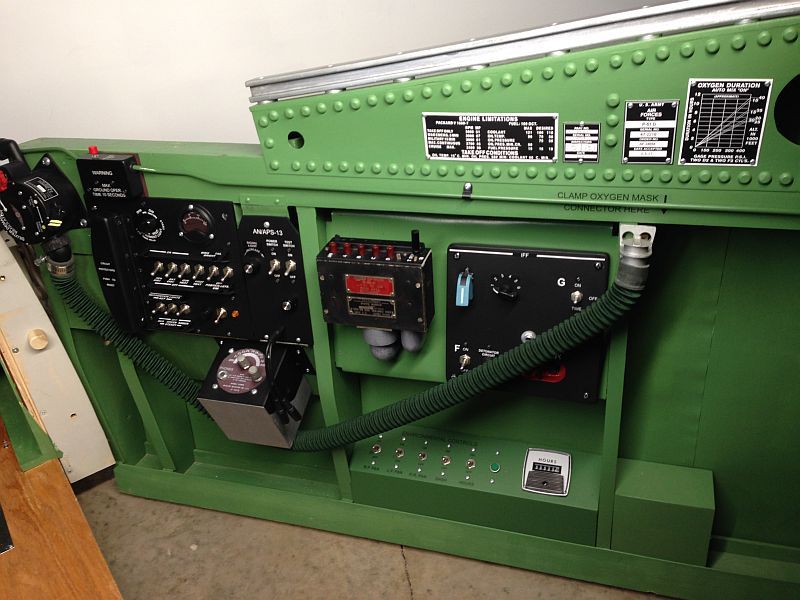
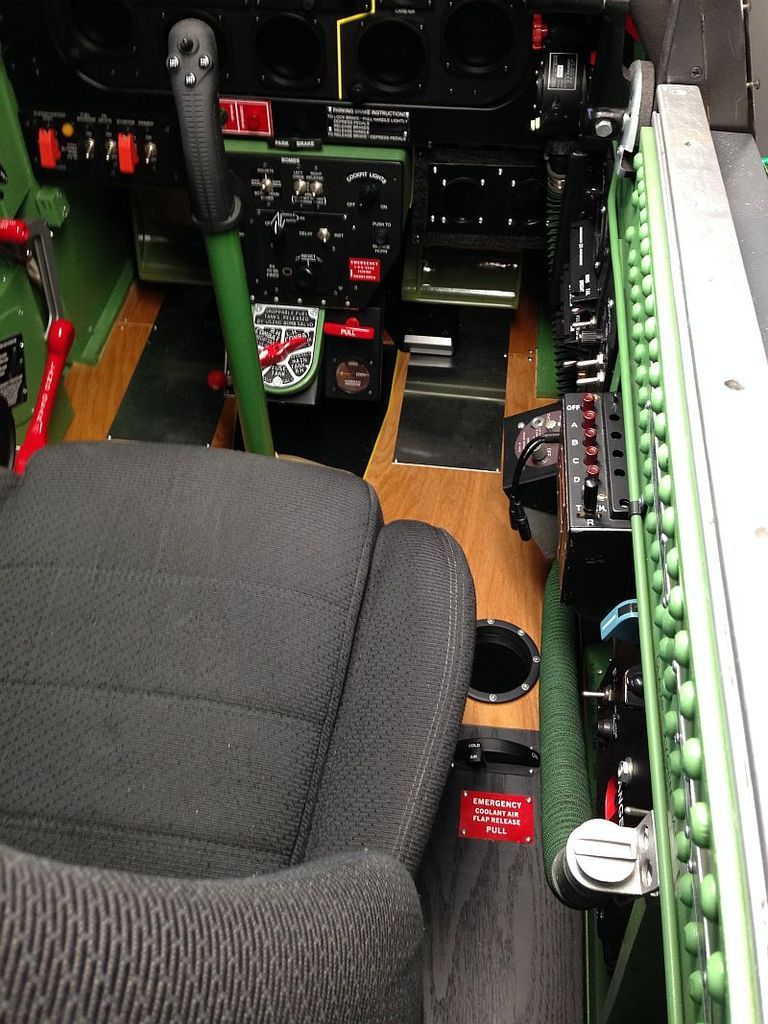
Right side separated from main frame for assembly. Just below the O2 regulator in the white area you can see a rod sticking out of the frame. There is a corresponding hole in the side frame. To install the side I position it on the rod and slide it forward.
When the back section is pushed toward the frame it sits on a small ledge for support. There is a 4 inch bolt that goes through the side into the ledge locking the side in place and a 3 inch screw holding the top to the rear section.
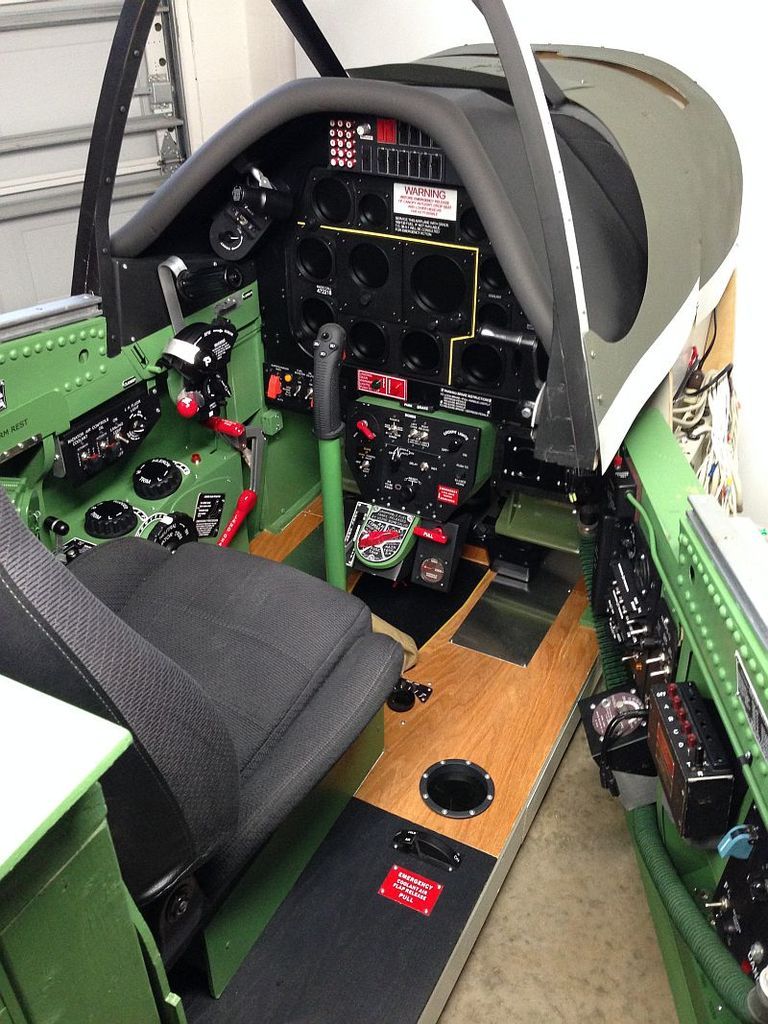
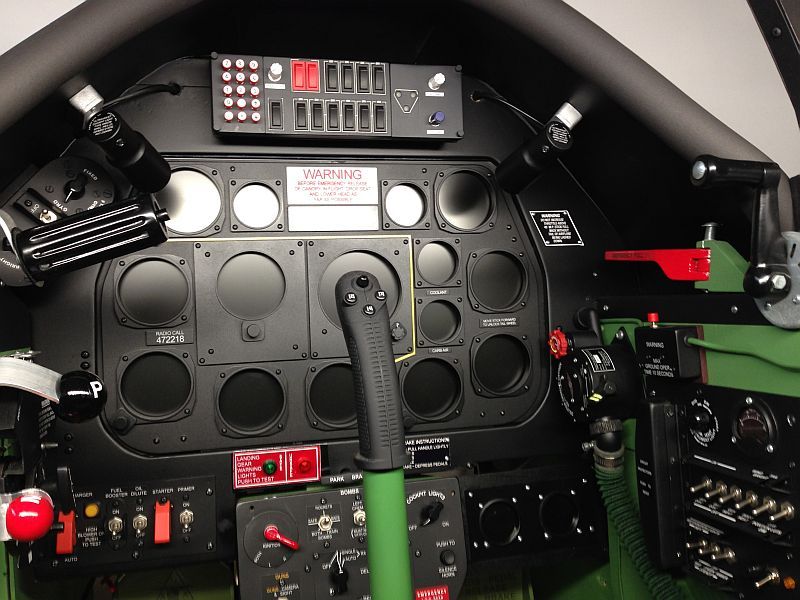
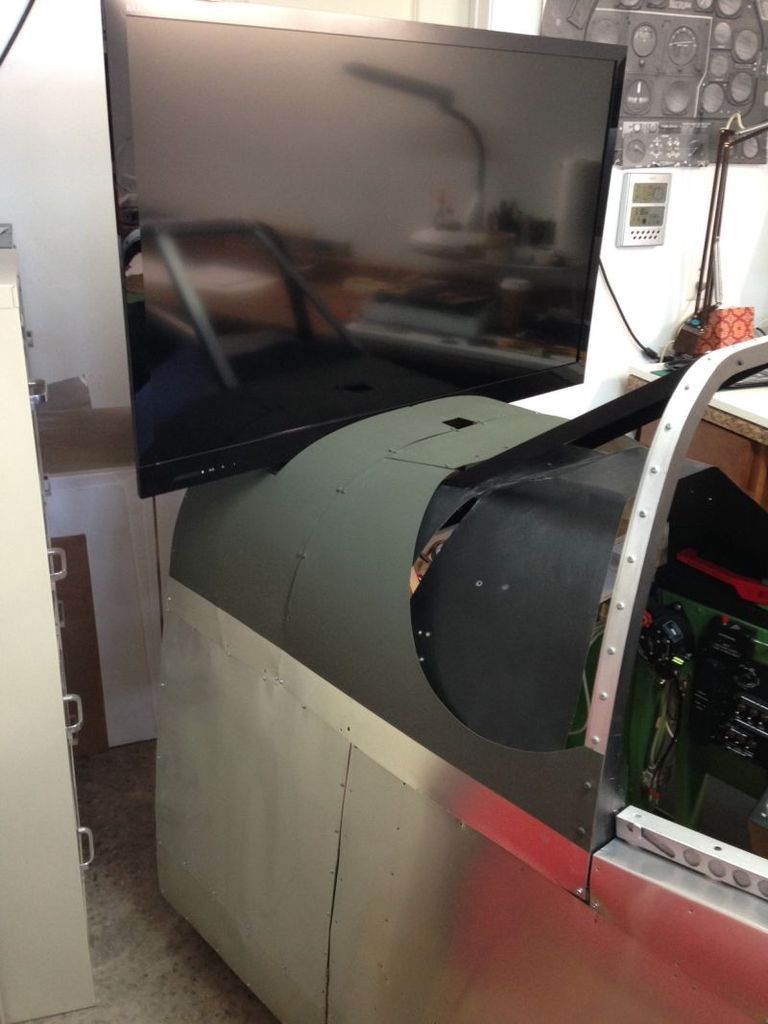
The notch in the cowl allows the 46 inch screen to sit lower.
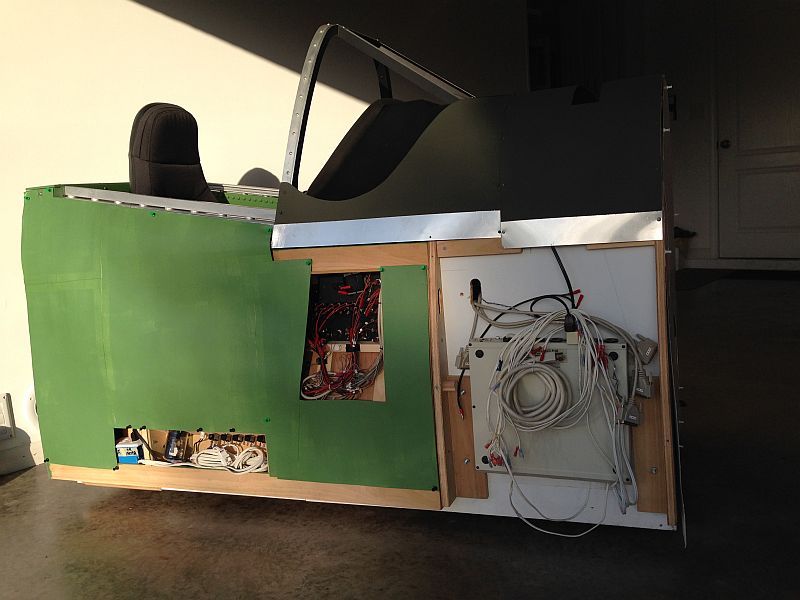
Since the right side will be against the wall and not seen I chose not to install aluminum. The green you see is cardstock painted to match the interior which shows around the controls panels. This was also done for the left side so bare metal would not be seen.
At the right you can see an old desktop control box I modified to handle the 120v needs of the pit. I removed the original switches and ran their wires to the lower left where you can see the back of the “environmental” panel. I added a toggle and light to the pit’s electrical panel that will let me turn this system on/off with one switch.
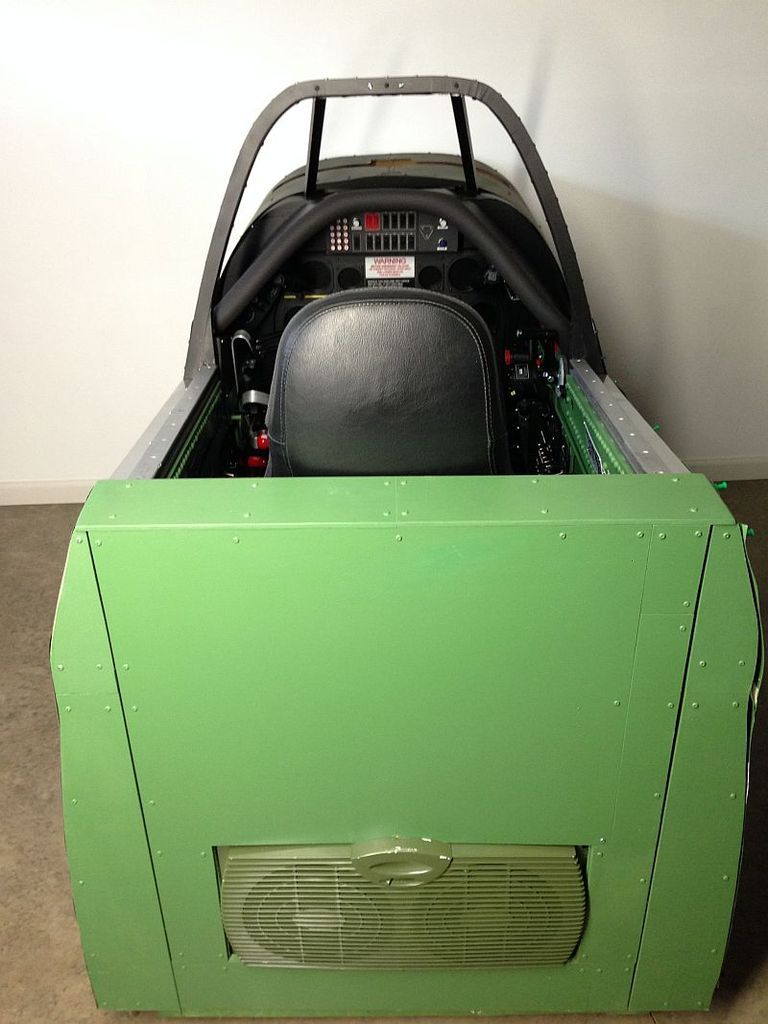
And, “The End.”
Here you can see the rear fan installed to pull air out of the pit. There are also 2 smaller fans installed at the front under the dash (not shown), separately switched on the environmental panel, to push air into the pit. Years ago when this was my racing pit I found that it can get warm and stuffy. The same fans were installed as a solution. I also have a portable A/C unit in my office with a remote for those days when I fly too close to the sun and get too hot!
It’s been a while since I last posted about my build so here is an update. Over the weekend I finalized a lot of the work on the pit. It is not complete yet (will it ever be?) but it is to the point that it can be moved from the shop to my office/hanger where it will reside. I took advantage of the great weather and moved the pit from my shop to the main part of the garage so I could take some pictures.
The pit is 3½ ft. wide by 6 ft. long and 4½ ft. tall and was built in my 10 by 12 ft. shop. That sounds like a lot of room to work until you figure in the 10 foot long counter top on one side and the workbench, tool chest and file cabinets on the other. That allows 5 feet of workable space and with this project I found myself moving 1-2 things to get to the third. The shop was built for small projects like models but this 1:1 scale model pushed the limits!
As I may have mentioned before this pit has to go through an opening in the house 29 inches wide. It will break down into 2 sides, the back, a main base, seat, windshield and dash and be reassembled in my office. You will see some of this in the pics below.
Take care
Ed
The “office”
Left side opened as a door showing the caster supporting the non hinged end.
Next to the seat you can see a small latch. This is used to pull the side tightly closed.
Right side separated from main frame for assembly. Just below the O2 regulator in the white area you can see a rod sticking out of the frame. There is a corresponding hole in the side frame. To install the side I position it on the rod and slide it forward.
When the back section is pushed toward the frame it sits on a small ledge for support. There is a 4 inch bolt that goes through the side into the ledge locking the side in place and a 3 inch screw holding the top to the rear section.
The notch in the cowl allows the 46 inch screen to sit lower.
Since the right side will be against the wall and not seen I chose not to install aluminum. The green you see is cardstock painted to match the interior which shows around the controls panels. This was also done for the left side so bare metal would not be seen.
At the right you can see an old desktop control box I modified to handle the 120v needs of the pit. I removed the original switches and ran their wires to the lower left where you can see the back of the “environmental” panel. I added a toggle and light to the pit’s electrical panel that will let me turn this system on/off with one switch.
And, “The End.”
Here you can see the rear fan installed to pull air out of the pit. There are also 2 smaller fans installed at the front under the dash (not shown), separately switched on the environmental panel, to push air into the pit. Years ago when this was my racing pit I found that it can get warm and stuffy. The same fans were installed as a solution. I also have a portable A/C unit in my office with a remote for those days when I fly too close to the sun and get too hot!

Re: P-51D cockpit build
Wow, I am impressed by the attention to detail. Would like to see this in operation - my only reservation would be the main display, which looks like a single forward view?
MarkH
